Topics Map > •Telephones and Voicemail
Telecomm: Cisco VoIP Portal
You can customize your phone options using the Cisco Unified Communications Self Care Portal
** First-time Login: you will be prompted to create a PIN. This will be used for login to your Personal Directory on your phone. You must be on Rice Network or use VPN to log in.
Contents
Cisco VoIP Portal: Adding Phone for Single Number Reach
Schedule "Workday" : set the time your work phone rings on additional phone.
Cisco VoIP Portal (Unified Communications Self Care Portal)
Access Cisco VOIP portal at this link: Cisco VoIP Phone Portal
Step 1: You must be on the Rice Network or use VPN to login to this portal. After you have setup your account, you can find this link under the (Rice Network Only) Login module.
Step 2: Create a PIN (First-time users only).

Step 3: Enter your NetID and NetID Password and select Login.

Phones
Step 1: Locate the Phones tab.
Step 2: Select My Phone > Identifies Company Phones > Phone number and extension information.
Single Number Reach
Step 1: Select the option: to Add an Additional Phone.
Step 2: Enter the Phone Number of the additional phone.

- IMPORTANT: Add the +1 in front of the phone number +17135551212 [no spaces / must be in this format]
- Select Enable Single Number Reach - this will ring your business phone and this phone when the business line is dialed.
- Select Enable Move to Mobile (if this is a mobile phone).

Step 3: Click Save.
Schedule Workday
Step 1: Select Workday to schedule the Single Number Reach feature.

- Add a New Schedule
- Enter a name for the schedule
- Select when you want your phone to ring:
- Ring only during specific times
- Ring all the time

Step 2: Select the Time zone - (GMT-6:00) America/Chicago).

Step 3: Click Save.

If you need assistance, please email helpdesk@rice.edu to open a ticket with Telecommunications with the following information:
- Name
- NetID
- Office phone number
Phone Settings

- To 'Add a phone extension', select the 'Add New Speed Dial' and enter information
- To 'Add an external number', select the 'Add New Speed Dial' and enter information
- In the portal, you will see a list of Speed Dial phone numbers
- On the Cisco phone display, you will see the following.
- Speed dial position 1 and 2 are indicated on the right.
- To see more 'speed dial' numbers, select the 'down navigation'

- Use this 'Call History' feature to activate/deactive missed call log

- Use this 'Phone Contacts' feature to add 'Personal Contacts
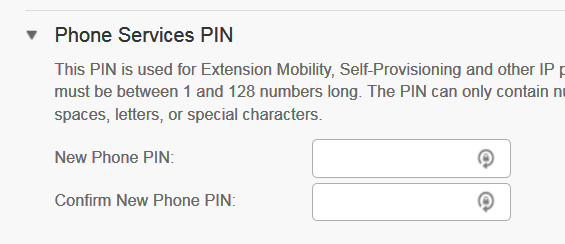
Before you begin, go to General Settings > Phone Services PIN and set PIN.
Enter PIN to start adding Personal Address Book entries for your phone.
On the Cisco phone, before you can use the Personal Directory functionality, you must set the Phone Select the 'Contacts' icon to retrieve information and call a contact from the Personal and Corporate Directory

Select 'Personal Directory', then, select the 'Enter' button on the phone

Select 'Personal Address Book', then, select the 'Enter' button on the phone

Search Personal Address Book for contact information, scroll down to find either " Last Name, First Name or Nickname",
Select 'Submit' below the phone display:


Select "Sammy",

Select the phone number to 'Dial'

This feature allows you to set up Call Forwarding
- Forward all calls to Voicemail or another number
- Advanced calling rules - how to handle 'internal calls' and 'external calls'. Select the option, and select 'Save'

Voicemail - this information was provided when your VoIP was set up. Call the Help Desk from your office for further assistance with Voicemail.


